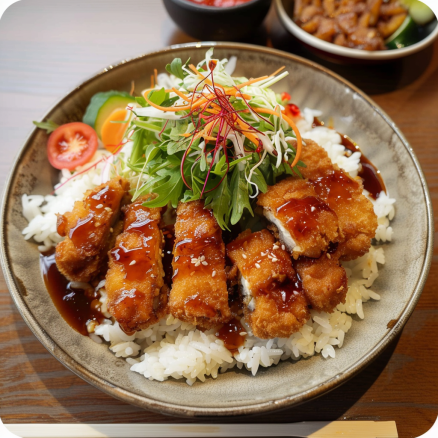
Japanese Katsu Bowls with Tonkatsu Sauce: A Crispy, Flavorful, and Easy Recipe 🍚🥢✨
1. Introduction: Discover the Delight of Homemade Japanese Katsu Bowls
Craving a taste of Japan? Look no further than these delectable Japanese Katsu Bowls with Tonkatsu Sauce. This dish brings together the comforting flavors of crispy, golden-brown chicken cutlets, fluffy Japanese rice, and the tangy-sweetness of homemade or store-bought tonkatsu sauce. It’s a complete meal in a bowl, perfect for a weeknight dinner or a weekend treat. Transform ordinary ingredients into an extraordinary culinary experience with this easy-to-follow recipe.
These Katsu Bowls are not just about taste; they’re about creating a balanced and satisfying meal. The crispy chicken provides protein, the rice offers carbohydrates for energy, and the shredded cabbage adds a refreshing crunch and vital nutrients. Whether you’re a seasoned home cook or a beginner in the kitchen, this Japanese Katsu Bowl recipe is sure to become a new favorite. If you love bowl recipes, check out these Korean Ground Beef Bowls.
2. Ingredients: What You’ll Need for Your Japanese Katsu Bowl
2 cups cooked Japanese rice (short-grain recommended for the best texture)
2 chicken breasts, boneless and skinless, about 6 ounces each
1 cup panko breadcrumbs (Japanese breadcrumbs for extra crispiness)
1/2 cup all-purpose flour, for dredging
2 large eggs, beaten
1/4 cup Tonkatsu sauce (plus more for drizzling)
1 cup shredded cabbage (or coleslaw mix), for topping
Salt and pepper to taste, for seasoning the chicken
Vegetable oil for frying (canola or peanut oil works well)
Optional garnishes: sesame seeds, green onions, pickled ginger
3. Step 1: Prepare the Chicken for Katsu Perfection
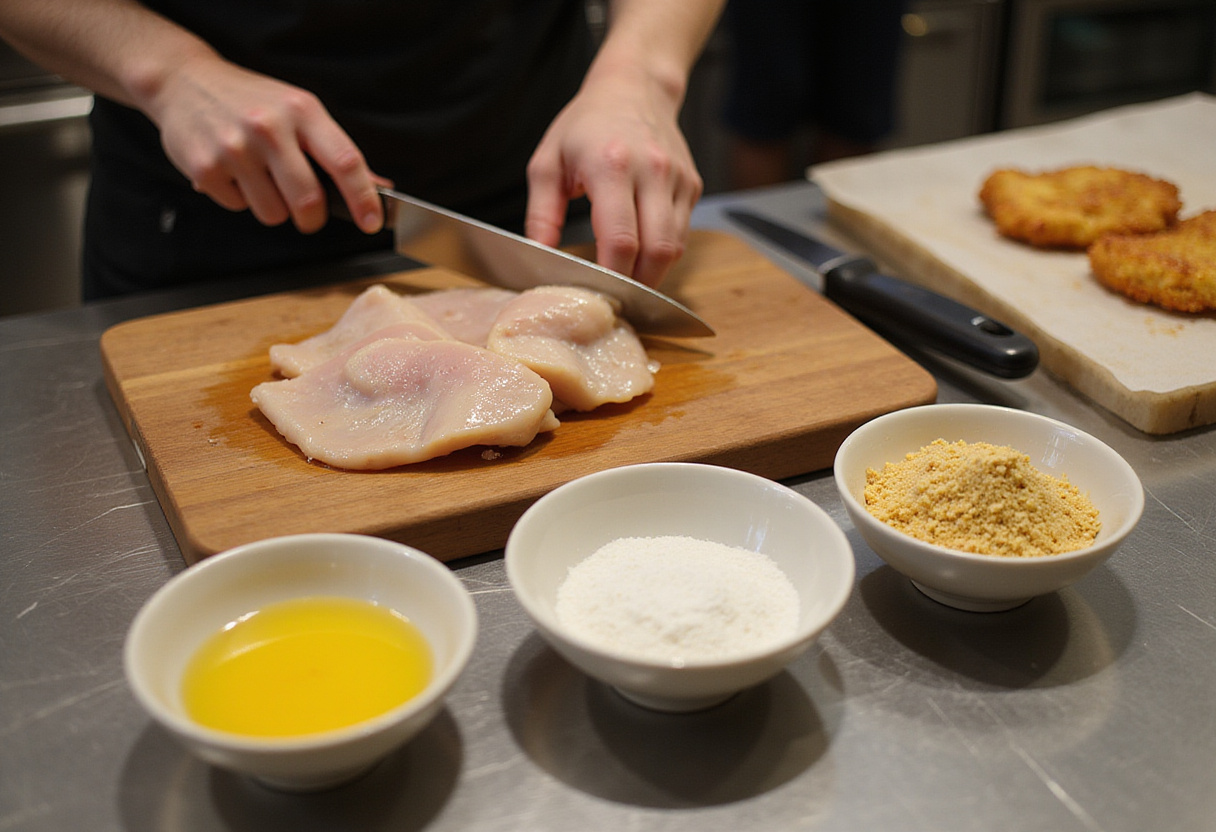
The key to the perfect chicken katsu starts with proper preparation. Place the chicken breasts between two sheets of plastic wrap. Using a meat mallet or rolling pin, gently pound them to an even thickness of about 1/2 inch. This ensures even cooking and a more tender result. Season both sides generously with salt and pepper. For an extra layer of flavor, you can also use garlic powder or paprika. For a similar recipe, check out this link.
4. Step 2: Bread the Chicken: Achieving the Ultimate Crispy Coating
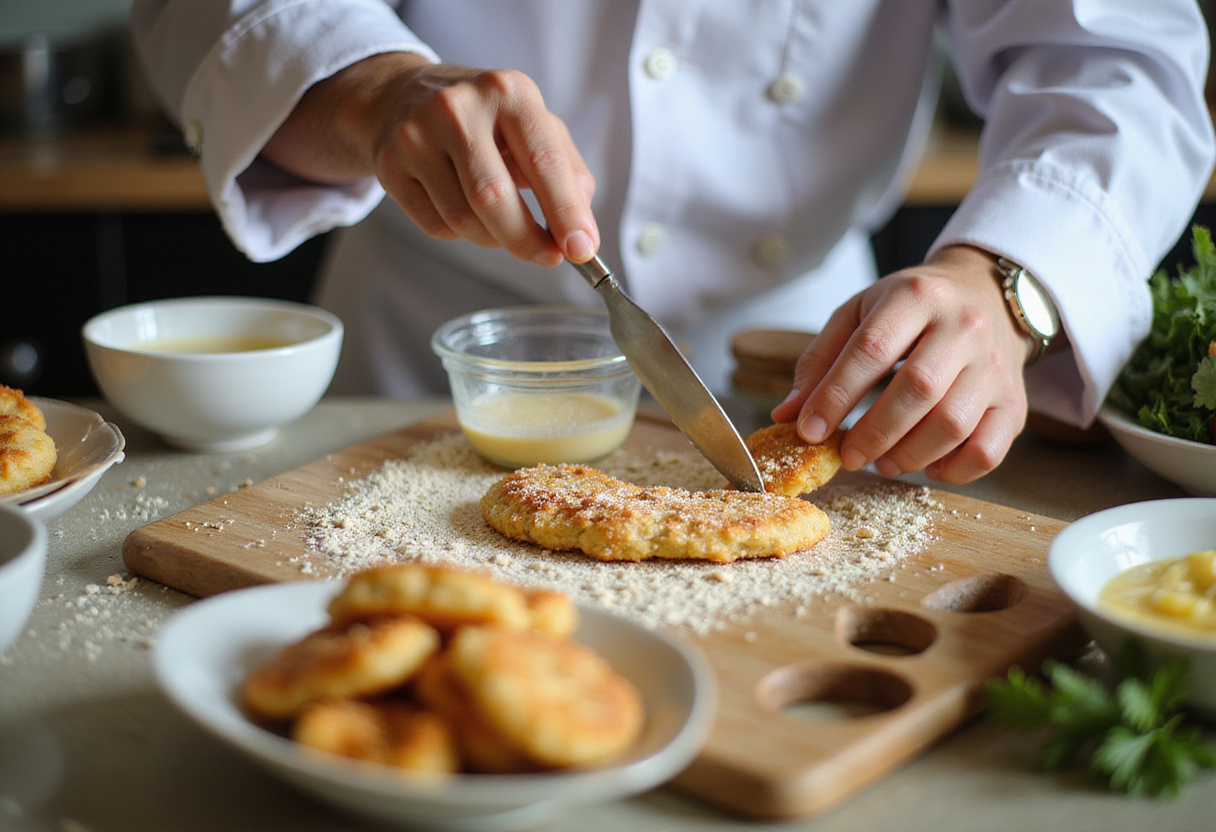
Creating a well-organized breading station is essential for achieving that signature crispy texture. Set up three shallow bowls in a row. In the first bowl, place the all-purpose flour. In the second, add the beaten eggs. And in the third, pour the panko breadcrumbs. Dredge each chicken breast in the flour, shaking off any excess. Next, dip it into the beaten egg, ensuring it’s fully coated. Finally, press the chicken into the panko breadcrumbs, making sure they adhere evenly to all surfaces. This triple-coating process is what gives Katsu Chicken its irresistible crunch. If you’re interested in other chicken recipes, take a look at these chicken recipes.
5. Step 3: Fry the Chicken: Golden-Brown Perfection
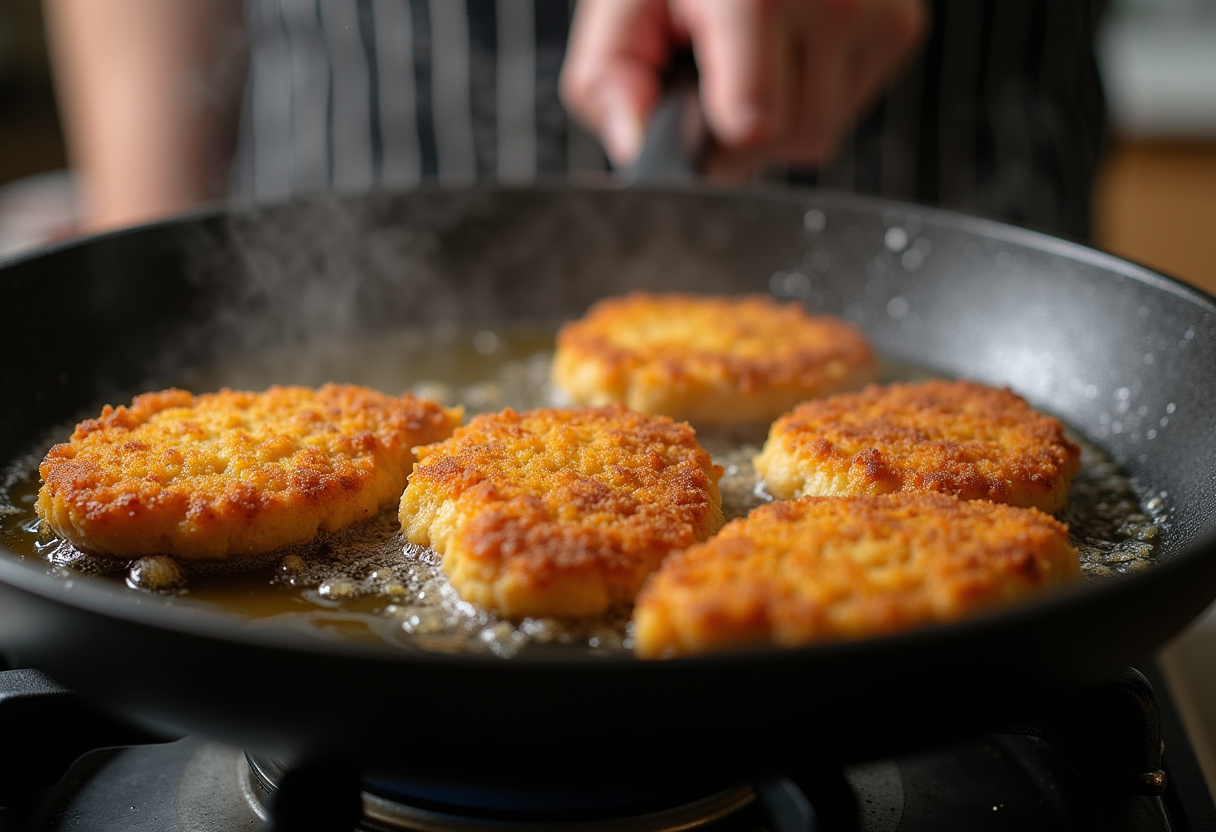
Heat a generous amount of vegetable oil in a large skillet or deep fryer over medium heat. The oil should be deep enough to partially submerge the chicken cutlets. Carefully add the breaded chicken cutlets to the hot oil, being careful not to overcrowd the pan. Cook for about 4-5 minutes per side, or until golden brown and cooked through. The internal temperature should reach 165°F (75°C). Use a meat thermometer to ensure doneness. Once cooked, transfer the crispy chicken katsu to a paper towel-lined plate to drain any excess oil.
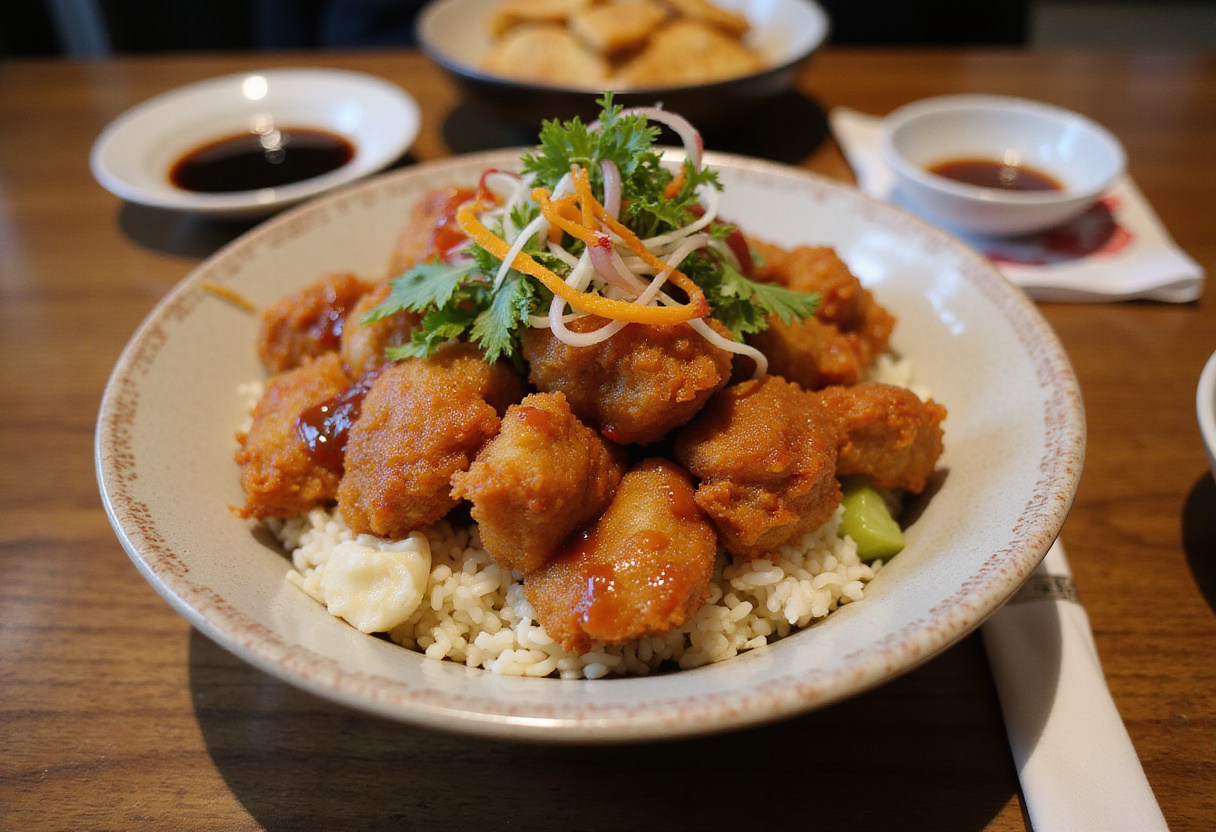
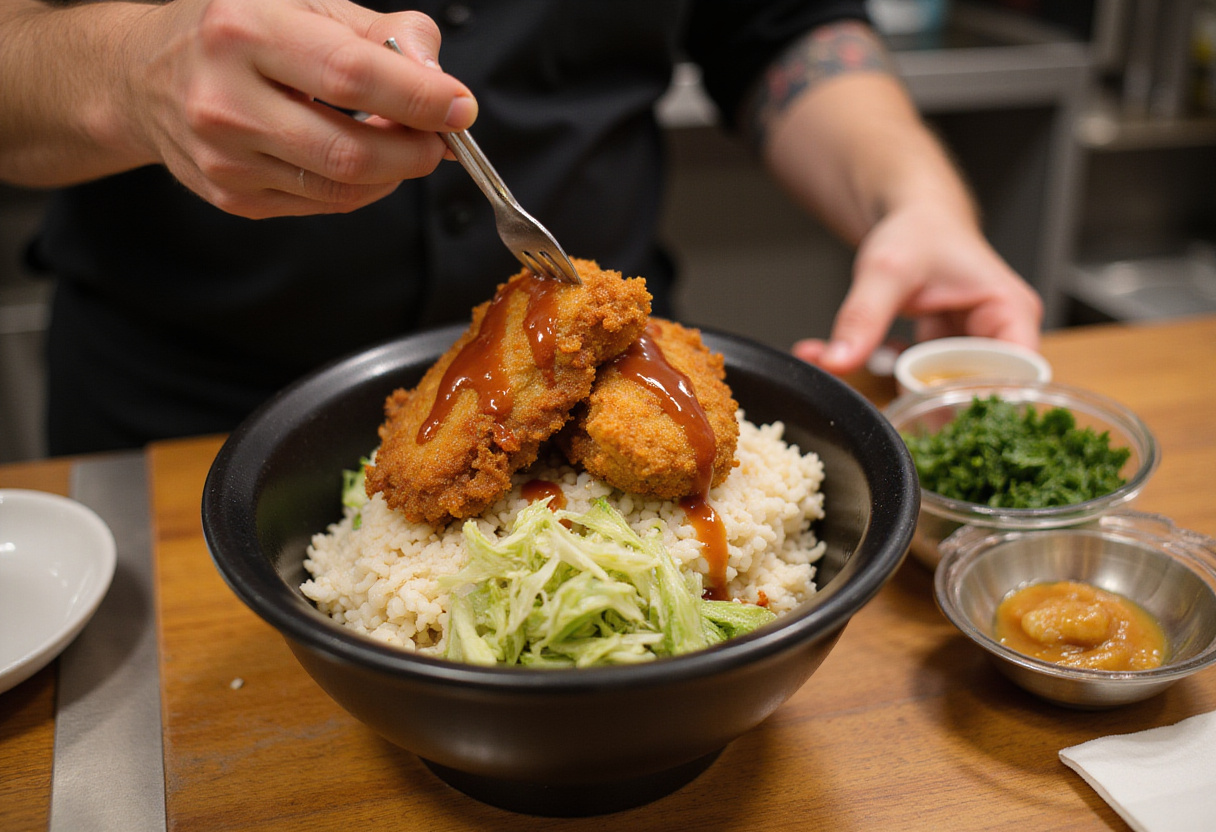
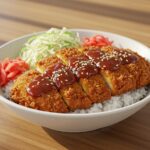
6. Step 4: Assemble the Katsu Bowls: Bringing It All Together
Now for the fun part – assembling your Katsu Bowls! Place a generous serving of cooked Japanese rice at the bottom of each bowl. Slice the crispy chicken cutlets into strips and arrange them artfully on top of the rice. Add a generous handful of shredded cabbage (or coleslaw mix) alongside the chicken. Finally, drizzle generously with tonkatsu sauce. Add any optional garnishes you like, such as sesame seeds, chopped green onions, or pickled ginger. Serve immediately and enjoy!
7. Storage Tips: Keeping Your Katsu Fresh
For any leftovers, store the assembled Katsu Bowls in an airtight container in the refrigerator for up to 2 days. For optimal crispiness, store the chicken cutlets separately. Reheat the chicken in a preheated oven at 350°F (175°C) for about 10-15 minutes, or until heated through and crispy. You can also reheat them in an air fryer for an even crispier result. Day-old rice also works well with this easy beef and broccoli.
8. Serving Suggestions: Elevate Your Katsu Bowl Experience
While Japanese Katsu Bowls are delicious on their own, there are many ways to elevate your meal. Serve them with a side of miso soup for a traditional Japanese experience. Add pickled vegetables, such as takuan (pickled radish) or kyuri (pickled cucumber), for a tangy contrast. A simple green salad with a light vinaigrette is also a great accompaniment. For a refreshing drink, try iced green tea or ramune (Japanese soda). If you’re looking for another dish from Japan, check out this Tomato Pasta.
9. Conclusion: Enjoy the Taste of Japan at Home
With this simple and delicious recipe, you can easily create authentic Japanese Katsu Bowls with Tonkatsu Sauce in your own kitchen. The combination of crispy chicken, fluffy rice, and tangy-sweet sauce is simply irresistible. So gather your ingredients, follow these easy steps, and get ready to enjoy a taste of Japan that’s sure to impress. Fluffy Pancakes are also one of our best recipes!
FAQs: Your Questions About Katsu Bowls Answered
What is Tonkatsu Sauce? – Tonkatsu sauce is a savory-sweet condiment made from a base of fruits and vegetables, such as apples, tomatoes, and carrots, along with soy sauce, vinegar, and spices. It has a thick consistency and a unique flavor that perfectly complements breaded and fried dishes. You can find it at most Asian supermarkets or online.
Can I use pork instead of chicken? – Absolutely! Traditional Katsu is made with pork tenderloin. Simply substitute the chicken breasts with pork cutlets and follow the same recipe.
Is Katsu Bowl healthy? – While Katsu Bowls are higher in calories due to the frying process, you can make them healthier by baking the chicken instead. To bake, preheat your oven to 400°F (200°C). Place the breaded chicken cutlets on a baking sheet lined with parchment paper and bake for about 20-25 minutes, or until golden brown and cooked through.
Can I make Katsu Bowls vegetarian? – Yes! You can substitute the chicken with firm tofu or eggplant slices. Bread and fry or bake them according to the recipe instructions for a delicious vegetarian option.
Indulge in the ultimate comfort food with these Japanese Katsu Bowls featuring crispy chicken cutlets and rich tonkatsu sauce, served over fluffy rice and topped with crunchy cabbage. Perfect for any meal, this dish brings a taste of Japan to your kitchen.
Ingredients
Scale
2 cups cooked Japanese rice
2 chicken breasts, boneless and skinless
1 cup panko breadcrumbs
1/2 cup all-purpose flour
2 large eggs
1/4 cup Tonkatsu sauce
1 cup shredded cabbage
Salt and pepper to taste
Vegetable oil for frying
Instructions
Prepare the chicken by pounding it to an even thickness and seasoning with salt and pepper.
Bread the chicken by coating it in flour, dipping it in beaten eggs, and pressing it into panko breadcrumbs.
Fry the breaded chicken in heated vegetable oil until golden brown and cooked through.
Assemble the Katsu Bowls by placing rice in a bowl, topping it with sliced chicken, shredded cabbage, and a drizzle of tonkatsu sauce.
Notes
Store assembled Katsu Bowls in an airtight container in the fridge for up to 2 days.
Reheat chicken in the oven to retain its crispiness before serving.
Enhance the meal with pickled vegetables or a side salad.
Prep Time:15 minutes
Cook Time:20 minutes
Category:Main Course
Method:Frying
Cuisine:Japanese
Nutrition
Serving Size:1 bowl
Calories:600 Kcal
Sugar:2g
Sodium:800mg
Fat:30g
Saturated Fat:5g
Unsaturated Fat:20g
Trans Fat:0g
Carbohydrates:50g
Fiber:2g
Protein:35g
Cholesterol:150mg
Sharing is caring!
Facebook
Twitter
Linkedin
Pinterest
Hi There!
Welcome to RecipesAlways.com! I’m Chef Megan, and I’m so excited to have you here as we embark on this flavorful journey together.