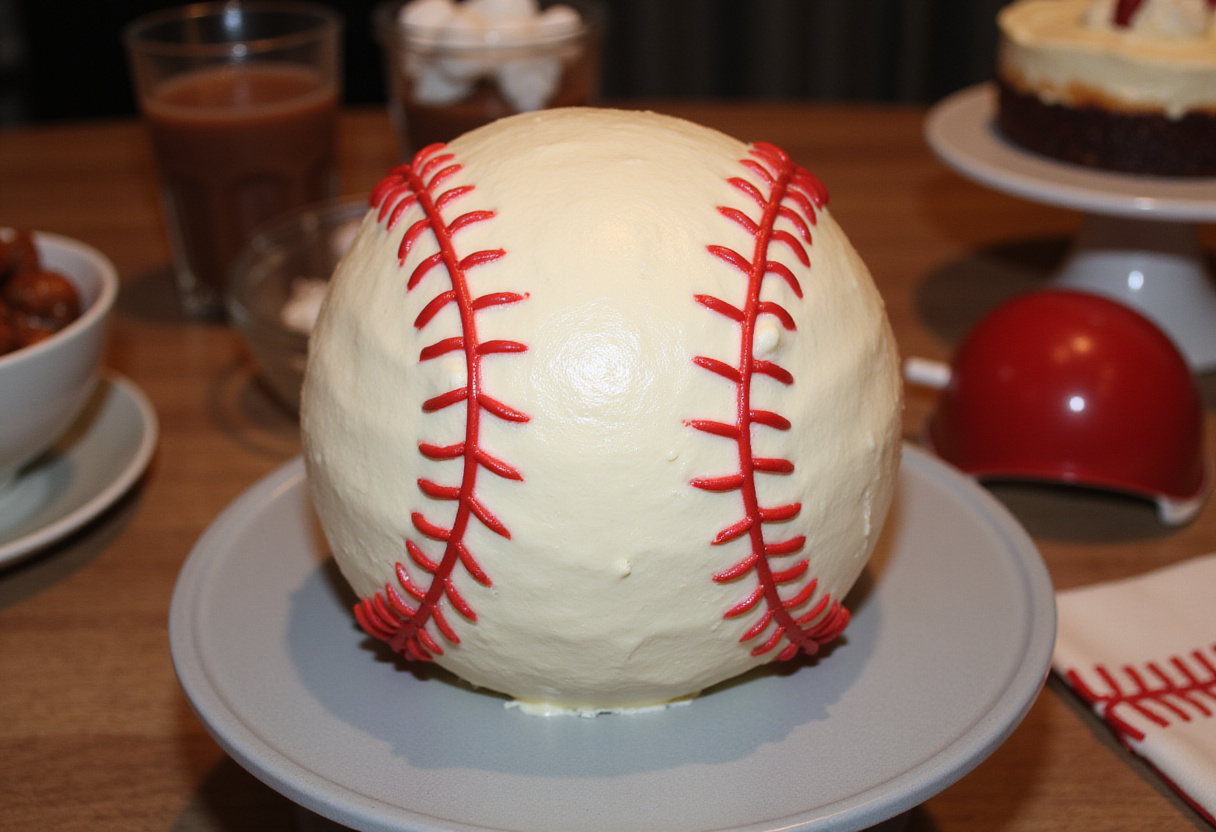
Batter Up! Crafting an Amazing Baseball Cake at Home ⚾🍰🎉
1. Introduction
Are you ready to knock it out of the park with your next baking project? Look no further! Making a baseball cake is a grand slam way to celebrate birthdays, sports victories, team celebrations, or any occasion that calls for a fun, themed dessert. This easy baseball cake tutorial will coach you through each step, ensuring that you create a visually stunning and utterly delicious treat that will be the highlight of any event. Whether you’re a seasoned baker looking for a new challenge or a beginner eager to learn, this detailed guide will provide you with all the essential tips, secret techniques, and creative tricks you need to succeed and avoid common pitfalls. From baking the perfect moist and flavorful cake to mastering the art of baseball cake decor, get ready to impress your captivated audience of friends and family with your newfound skills. Let’s step up to the plate and learn how to make baseball cake like a pro! Perhaps you’ll even consider pairing it with some of our other outstanding dessert recipes here!
2. Gathering Your Ingredients and Tools
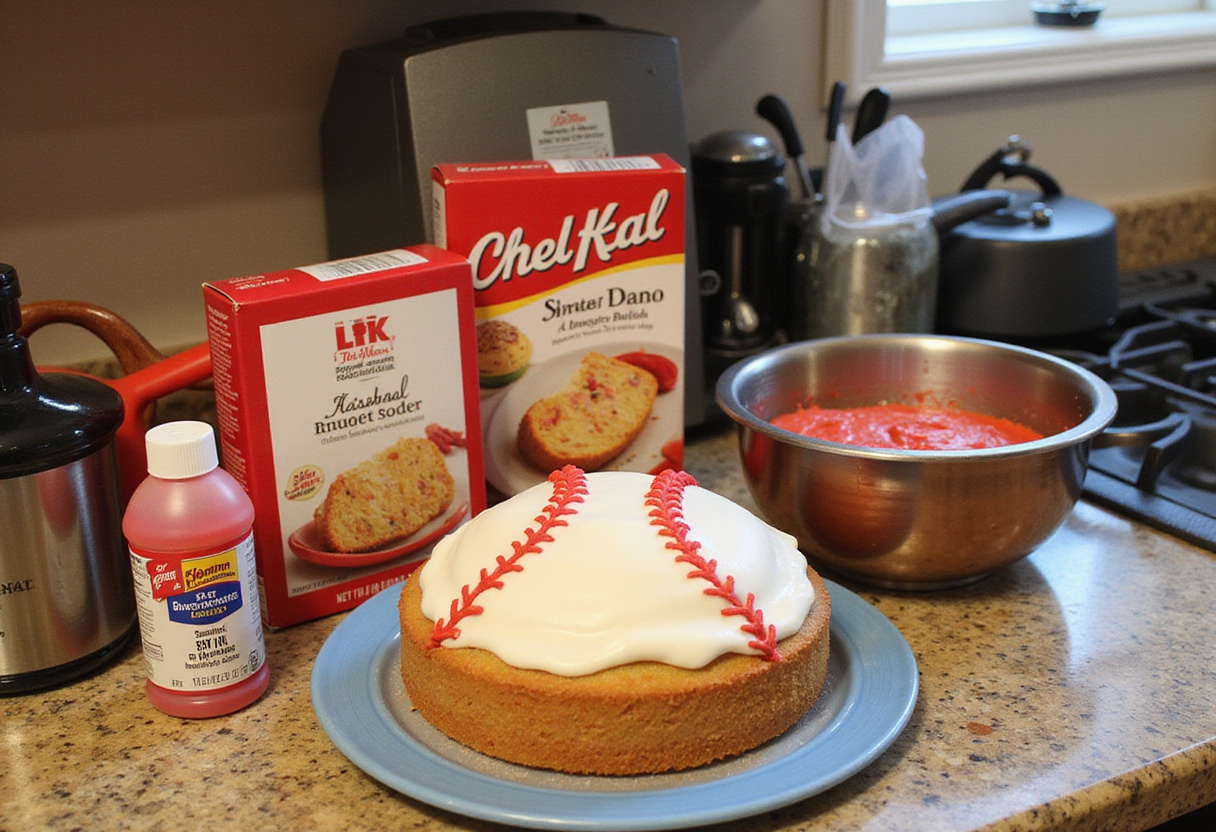
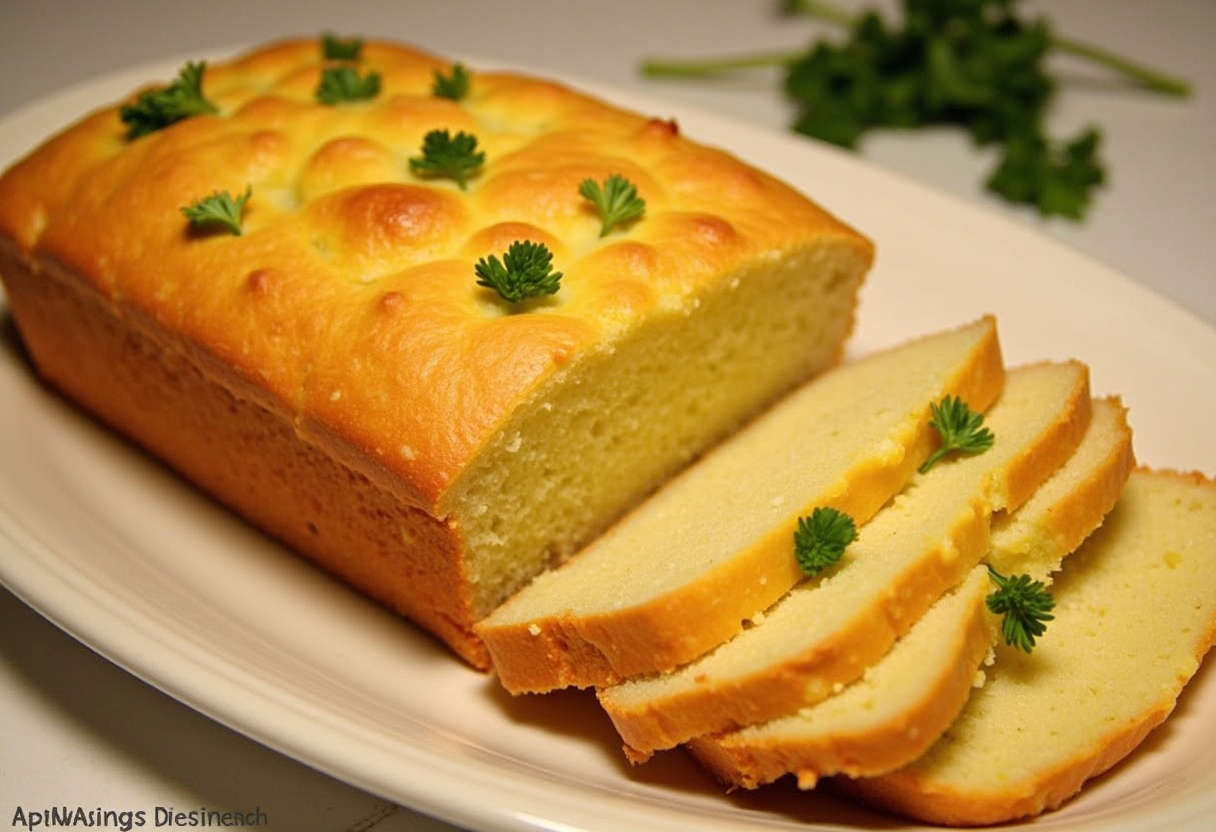
Before diving headfirst into the baking process, it’s absolutely crucial to gather all the necessary ingredients and tools and lay them out in an organized manner. Having everything prepped, measured, and within arm’s reach will significantly streamline the entire process and prevent any frustrating last-minute scrambles or disruptive interruptions that could throw off your timing. For the cake itself, you’ll need the usual all-star lineup: all-purpose flour, granulated sugar, large eggs, unsalted butter, whole milk (or buttermilk for extra richness!), and, of course, baking powder to give your cake that light and airy rise. A splash of pure vanilla extract enhances the overall flavor profile, creating a delightfully aromatic and delicious base for our incredible baseball cake. As for the frosting, good old classic buttercream is undeniably your best bet for achieving smooth, even coverage and allowing for easy shaping of those iconic baseball details. Red gel food coloring is also absolutely essential if you want to accurately recreate the instantly recognizable baseball stitching. Beyond just the ingredients, specific tools are extremely handy, if not utterly essential. A dedicated baseball cake pan is an absolute must-have for achieving that perfectly spherical, instantly recognizable baseball shape. Mixing bowls of various sizes, accurate measuring cups and spoons, a reliable rubber spatula, and a trusty piping bag fitted with a small round tip will also play crucial, supporting roles in the decorating process. Proper preparation and meticulous attention to detail are the keys to ensuring a smooth, stress-free, and thoroughly enjoyable baking experience from start to finish. You can also add complementary sprinkles, edible glitter, and other fun toppings to further enhance your amazing baseball cake decor and truly make it your own. If you enjoy the feeling of making something new, you may also enjoy our recipe for Easy Strawberry Cheesecake Rolls.
3. Baking the Perfect Cake
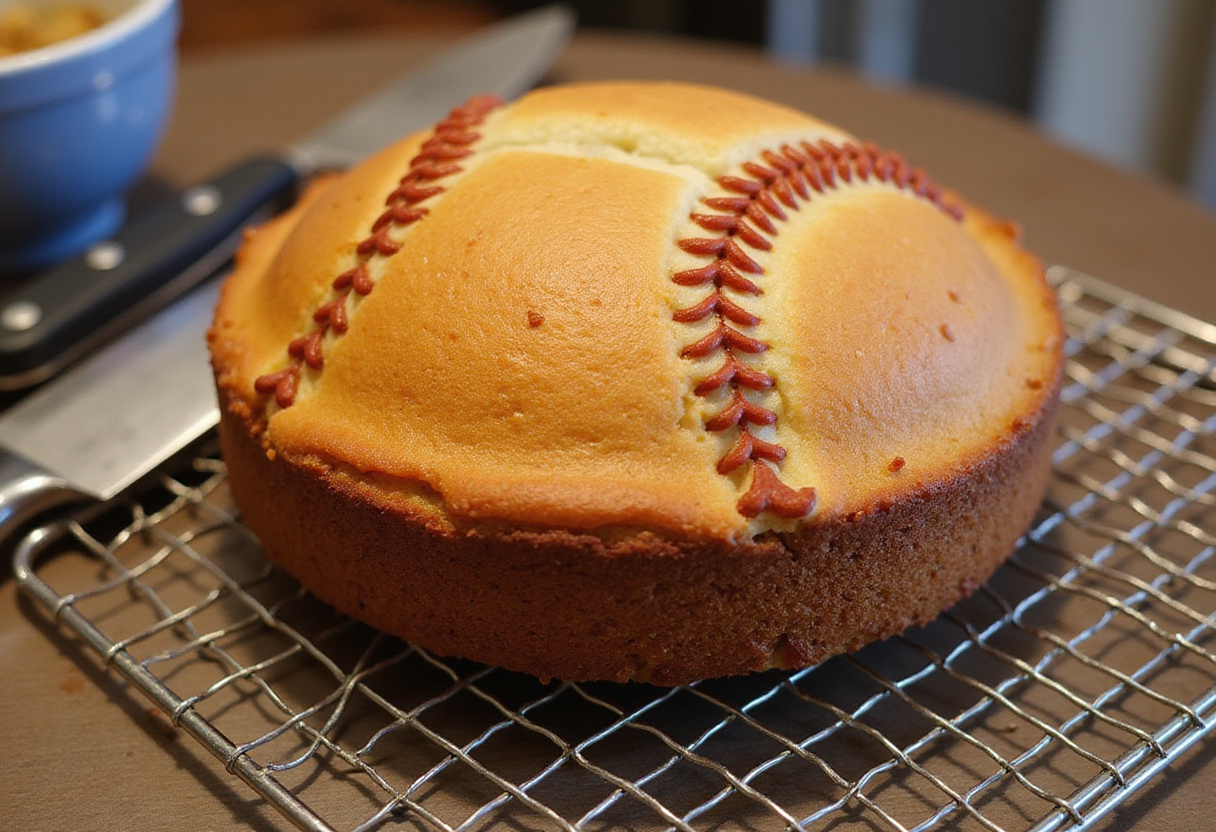
The very foundation of any great baseball cake decor, or any cake for that matter, undeniably starts with a flawlessly baked cake. Begin by preheating your oven to the precise temperature specified in your chosen baseball cake recipe (typically around 350°F or 175°C). Generously grease and lightly flour your baseball cake pan – paying special attention to all the nooks and crannies – to prevent the cake from sticking and ensure a clean, easy release once it’s baked. In a large mixing bowl, cream together the softened butter and granulated sugar until the mixture is light, airy, and wonderfully fluffy. Beat in the eggs one at a time, making sure each is fully incorporated before adding the next, then stir in the fragrant vanilla extract. In a separate, medium-sized bowl, whisk together the all-purpose flour and baking powder. Gradually add the dry ingredients into the wet ingredients, alternating with the milk, until everything is just barely combined. Be extremely careful not to overmix the batter, as this can lead to a tough, dense cake rather than a light and tender one. Pour the prepared batter into your greased and floured baseball cake pan, ensuring it’s evenly distributed throughout. Bake for the specified amount of time, usually around 30-35 minutes, or until a wooden toothpick inserted into the very center of the cake emerges perfectly clean. Let the cake cool in the pan for about 10 minutes before carefully inverting it onto a wire rack to cool completely. This seemingly simple step is absolutely vital for creating a stable, sturdy base for all your impressive easy baseball cake tutorial masterpiece!
4. Preparing the Frosting
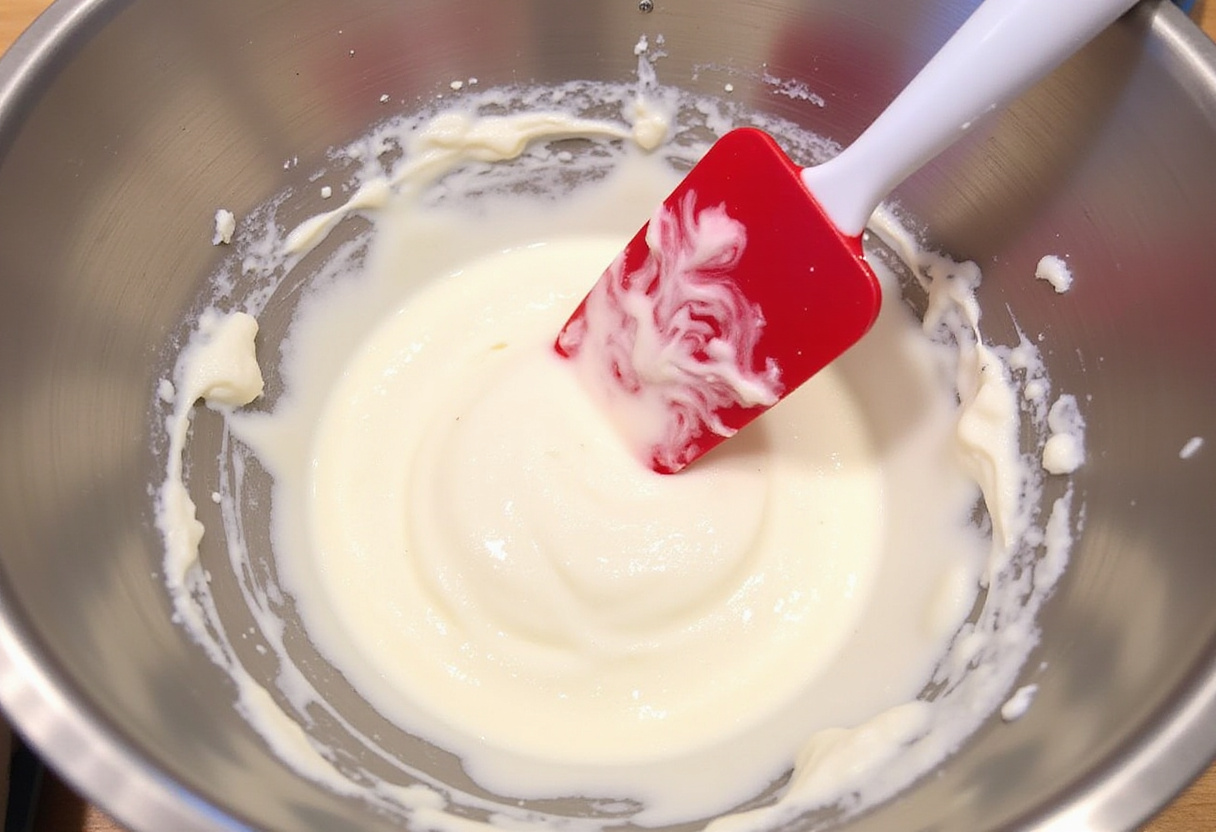
Frosting, without a doubt, is an absolutely essential component of any truly memorable baseball cake recipe. While the cake is happily baking away in the oven, take advantage of this downtime to prepare your luscious buttercream frosting. In a large mixing bowl, beat the softened butter (it should be softened, not melted!) until it’s wonderfully smooth and marvelously creamy. Gradually add in the powdered sugar, mixing on low speed at first until it’s mostly combined to prevent a huge cloud of sugar from erupting. Add the milk or heavy cream one tablespoon at a time until the frosting has reached your desired consistency and smooth, spreadable texture. Beat in the vanilla extract to further enhance and deepen the overall flavor profile. Once the frosting is perfectly smooth, creamy, and delightfully delicious, carefully divide it into two separate bowls. Leave one bowl of frosting plain white to serve as the base layer of your incredible baseball cake, and then tint the second bowl with vibrant red gel food coloring to create the iconic stitching detail. It’s highly recommended you use gel food coloring for the best and most vibrant results, as it tends to provide a much more intense color without significantly altering the overall consistency of the frosting. Transfer the red frosting into a piping bag fitted with a small, round piping tip. This professional setup will allow you to create incredibly precise and impeccably smooth stitching lines for your amazing baseball cake decor. Or if you’d like to try another recipe, check ou our Blueberry Cheesecake Cookies!
5. Assembling and Frosting the Cake
Once the cake has completely cooled down, it’s finally time for the fun part – assembling and frosting it! Use a long, serrated knife to carefully level the top of the cake, creating a perfectly flat surface that will serve as an ideal canvas for your frosting. Place the leveled cake on a sturdy cake board or your favorite serving plate. Using a large offset spatula, evenly and generously cover the entire cake with a smooth, consistent layer of white buttercream frosting. Smooth the frosting out as much as possible, aiming to create a perfectly clean and even canvas for your awesome baseball cake decor. If you’re striving for an absolutely flawless surface, consider using a dedicated cake smoother or scraper to achieve that professional-level finish. Chill the freshly frosted cake in the refrigerator for approximately 30 minutes to give the buttercream frosting a chance to firm up slightly. This will make it significantly easier to add the intricate red stitching details without accidentally smudging the pristine white frosting underneath. This step in our valuable easy baseball cake tutorial is absolutely crucial for achieving a super clean and professional-looking final result. We found this information about baseball cakes that you may find helpful: baseball cake.
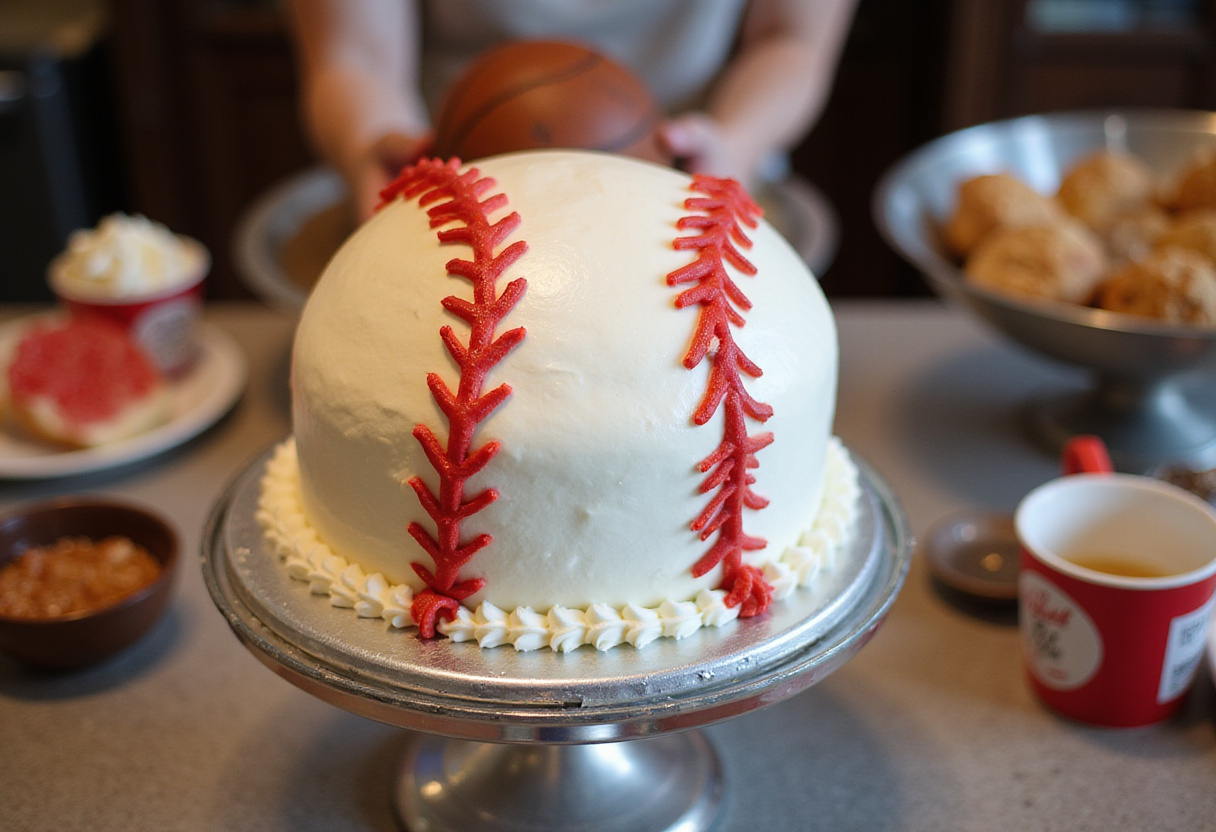
6. Adding the Baseball Details
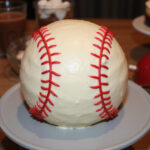
The exquisite little details are what truly transform a simple, ordinary cake into a stunning, show-stopping baseball cake that everyone will be talking about. Carefully remove the chilled cake from the refrigerator and place it on your work surface. Using your piping bag that’s already filled with the vibrant red frosting, carefully pipe gently curved lines to perfectly mimic the authentic stitching found on a real baseball. Start at the top of the cake and then gracefully work your way down, making sure you space the lines evenly apart to maintain a visually appealing and realistic look. Use a clean toothpick or a small offset spatula dipped in hot water to gently smooth out any minor imperfections or slight inconsistencies in the frosting, ensuring everything looks crisp and polished. Next, pipe short, delicate vertical lines that are perpendicular to the curved lines to fully complete the classic baseball stitching pattern. Pay close attention to the even spacing and proper alignment of the stitches, as this will contribute greatly to creating an incredibly realistic and authentic final product. These fine, meticulously crafted details will instantly elevate your amazing baseball cake decor, making your sweet creation stand out from the crowd and truly impress everyone who sees it! If you’re feeling particularly ambitious and creative, consider adding a touch of edible glitter, sparkling sprinkles, or even a light dusting of edible shimmer powder to the stitching for an added touch of eye-catching sparkle and visual interest. With these easily achievable steps, you’re well on your way to mastering how to make baseball cake like one of the top professional bakers!
7. Creative Baseball Cake Decor Ideas
Take your already stunning baseball cake to the next level of awesomeness with even more creative and imaginative decor ideas that will leave everyone in awe. Consider adding a charming baseball-themed cake topper, such as a miniature baseball bat, a tiny catcher’s glove, or an adorable player figurine, perched right on top of the cake. Edible images featuring beloved baseball logos, fun team mascots, or even personalized player photos can also add a unique and personalized touch that everyone will appreciate and remember! For a more rustic and visually interesting touch, use finely crushed graham crackers to create a “dirt” effect around the base of the cake, giving it a fun, ballpark-inspired look. You can also use dyed green coconut flakes to realistically simulate grass, or use melted chocolate to create “baseballs.” Or maybe you’ll be interested in our Southern Style Honey Butter Cornbread Poppers! Another fun idea is to create a complete baseball diamond right on top of the cake! Use green-tinted frosting to create the field and then use piped white chocolate shavings to build the bases. Don’t be afraid to freely experiment with different colors, unique patterns, and personalized details to perfectly match your favorite team’s colors and showcase your own creative personality. This easy baseball cake tutorial wholeheartedly encourages you to fully embrace your creativity!
8. Tips and Tricks for Success
Mastering the wonderful art of how to make baseball cake requires a few insider tips and invaluable tricks from seasoned baking veterans. Always, always start with a completely cooled cake to make the frosting process much, much easier and prevent any melty messes. If you have one, use a dedicated turntable to smoothly and evenly apply the frosting to your cake to achieve professional-looking results that will impress all your friends and family. If you find that your buttercream frosting seems too soft or difficult to work with, simply chill it in the refrigerator for a few minutes before using. Take some time to practice your piping skills on simple parchment paper before you begin actually decorating your precious cake. One of our favorite recipes also covers baking, take a peek at our Christmas Eve Cinnamon Vanilla Creamy Custard Pie! Don’t be afraid to make mistakes along the way; after all, everyone messes up sometimes! You can always scrape off the frosting and start over from square one; it’s all part of the learning process! Invest in high-quality and reliable baking tools, such as a well-made cake pan, a durable piping bag, and various decorating tips. And most importantly, try to relax, have lots of fun, and genuinely enjoy the entire process! Following this comprehensive easy baseball cake tutorial should ultimately feel like a delightful, creative, and deeply rewarding experience. Feel free to experiment with different exciting flavor combinations and unique design elements to create an incredible and memorable baseball cake recipe that’s totally unique and all your own. With these essential tips, you are definitely soaring along the path to creating a total show-stopping dessert that will have everyone begging for a second slice.
9. Conclusion
Creating an awesome baseball cake at home is an incredibly rewarding and surprisingly fun experience that anyone can achieve. From skillfully baking the perfect cake to beautifully mastering all the unique elements of baseball cake decor, each and every step of the process allows you to fully express your creativity and showcase your impressive baking talents. If you like this recipe, feel free to browse our other recipes here! This detailed easy baseball cake tutorial wholeheartedly provides you with all the valuable knowledge and overflowing inspiration you need to completely impress your friends and family with a homemade masterpiece. Whether you’re joyfully celebrating a birthday milestone, commemorating a hard-fought sports victory, or simply marking any special occasion, a perfectly decorated, deliciously fun baseball cake is absolutely sure to be a resounding hit with both kids and adults alike. So, gather all your carefully prepped ingredients, proudly put on your favorite apron, and get fully ready to create a mouthwatering cake that’s both visually stunning and irresistibly delicious. Now that you know exactly how to make baseball cake, the tasty possibilities are truly endless! Batter up and enjoy the amazing process!
Learn how to bake and decorate a stunning baseball cake at home with this easy-to-follow tutorial. Perfect for birthdays, sports celebrations, and any special occasion. Master the techniques and tips for a delicious and visually appealing baseball-themed dessert.
Ingredients
Scale
Cake:
2 1/2 cups all-purpose flour
1 1/2 cups granulated sugar
3 1/2 teaspoons baking powder
1 teaspoon salt
1/2 cup (1 stick) unsalted butter, softened
1 cup milk
2 large eggs
1 teaspoon vanilla extract
Frosting:
1 cup (2 sticks) unsalted butter, softened
4 cups powdered sugar
1/2 cup milk or cream
1 teaspoon vanilla extract
Red gel food coloring
Instructions
Preheat oven to 350°F (175°C). Grease and flour a baseball cake pan.
In a large bowl, cream together butter and sugar until light and fluffy. Beat in eggs one at a time, then stir in vanilla extract.
In a separate bowl, whisk together flour, baking powder, and salt.
Gradually add dry ingredients to wet ingredients, alternating with milk, until just combined. Do not overmix.
Pour batter into prepared pan and bake for 30-35 minutes, or until a toothpick inserted into the center comes out clean.
Let cake cool in pan for 10 minutes before inverting onto a wire rack to cool completely.
For frosting, beat softened butter until smooth and creamy. Gradually add powdered sugar, mixing on low speed until combined.
Add milk or cream, one tablespoon at a time, until frosting reaches desired consistency. Beat in vanilla extract.
Divide frosting into two bowls. Leave one bowl white, and tint the second bowl with red food coloring.
Once cake is completely cooled, level the top with a serrated knife. Place cake on a cake board or serving plate.
Evenly cover the entire cake with a layer of white buttercream frosting. Smooth the frosting as much as possible.
Chill the cake in the refrigerator for about 30 minutes.
Using a piping bag filled with red frosting, carefully pipe curved lines to mimic the stitching on a baseball.
Pipe small vertical lines perpendicular to the curved lines to complete the baseball stitching pattern.
Optional: Add baseball-themed cake toppers or decorations.
Notes
For best results, use gel food coloring for a vibrant red.
Cool the cake completely before frosting to prevent melting.
Use a turntable for smooth frosting application.
Practice piping on parchment paper before decorating the cake.